Showing posts with label recipe. Show all posts

Tuesday, May 5, 2015

Whole30 Confessionals - Day 2

Bottom line, it's getting better, but I need more sleep...
Watch for more confessions...


'My Soon to be Famous Spiral Sweet Potato Cakes' where so good I had to post the recipe below...

Watch to see what's for dinner...


The Spiral Sweet Potato Cakes are Whole30, vegetarian, gluten-free and certified deliciously approved.

Ingredients:
- 2 Large Sweet Potatoes, spiral sliced
- 2 eggs, whisked
- 3/4 cup Coconut Flour
- Salt Pepper and Chile Powder seasoning

Instructions:
1. Preheat over to 325 degrees. 
2.Heat skillet with coconut oil.
3. Toss everything in a big bow and combine.
4. Mold mixture like hamburgers, but not to tight. Mixture won't hold together well, but will come together better while cooking.
5. Cook on medium-high until brown (about 2 minutes), pressing down gently to help big the cake together. Flip gently and cook on the other side until brown. Add more oil if needed.
6. Place wired cookie sheet and put in the over to bake for about 5-10 minutes.    

Today's Stats:

Water Consumption:
74 ounces, getting better, but I need more:-(

Sleep:
I laid in bed for 7 hours and slept for about 3 of them:-(

Daily Meals:
5am - Coconut Milk Latte

8am - 2 Hard Boil Egg 

1:30pm - Late Lunch: Kale Salad, Veggie Noodles, Avocado & Tomato Salad with my Cajun Homemade Turkey Breast

7:30pm - Dinner: Split Chicken Breast, Shredded Cabbage & Carrot Salad with Sweet Bell Peppers, Snap Peas & 'My Soon to be Famous Spiral Sweet Potato Cakes'


Monday, September 8, 2014

One Pot Wonders - Slow Roasted (Beef) Chuck Roast

If you don't have yet, you need one, it is an essential for any kitchen...

DUTCH OVEN...

It took me awhile to save up for this, but it is well worth the time and money I spent on it...Actually, I didn't spend any money because I saved 6 William Sonoma gift cards I received over the years to purchase this cooking gem...Above is my 7.5 QT Le Creuset Dutch Oven, my pride & joy!!!

If you don't have a dutch oven, don't despair...you can use your crock pot, but I personally like a dutch oven because I can sear the meat in the same pot I braise it in, I can control the heat (my crock pot only has two temp low & high) and ultimately I think it produces better flavor...


Ok, to my fabulous Slow Roasted Chuck Roast...We bought a quarter cow (grassed, of course) over a year ago and have a few parts of the it left...I never really buy Chuck at the store because I always think it takes too long to cook it, but since I have it already I decided to cook it...Chuck is the cow's shoulder and is very muscular so it takes awhile to cook, usually braise (combination cooking method using both dry and moist heats : 1) sear over dry heat 2) then you slow cook in liquid)


Anyhow, I am going to start buying more Chuck more often because it's so easy to make and using my dutch oven it's a One Pot Wonder!!!


Ingredients
- 4-5 lb Chuck Roast (grassfed & finished preferred)
Note: Meat shrinks about 20%-25% when you slowly cook it. 
- 1 Yellow Onion, chopped
- 5 Carrots, chopped
- 6 Celery Stalks, chopped
- 8 Garlic Cloves
- 1 Leek
- 2 TBS Coconut Oil
- 32 oz Beef or Chicken stock (homemade preferred), you can also use water
- Salt & Pepper
- Curry Powder
- Chile Powder
- Garlic Powder
- Cardamom Powder

Instructions
1. Preheat Oven 250 degrees.

2. Season the meat. Coat the meat with salt and pepper. Place the rest of the seasonings in a bowl and mix. (I usually make extra seasonings and save for other occasion.) Using a strainer, heavily sprinkle the seasonings over the entire meat. This is very important when searing the meat. (Note: If I wasn't on the Whole30 I would season flour and coat the meat because the flour helps give it a better sear).


3. Turn the stove on high and heat the coconut oil in the dutch oven. Oil must cover the the entire bottom. When hot, place the meat in pot and sear all sides. 

4. Heat the stock or water in a medium size pot.

5. After searing remove meat. Bottom of pot should have created a fond (brown pieces, which is where a lot of flavor is hidden so keep this stuff).


5. Add the veggies to the pot and coast with fond. Ladle about half of the hot stock or water into the pot and whisk the bottom to deglaze the pan. Click the video to hear the sizzle - that is how you get rid of the find and deglaze the pan.


6. Add the meat back into the pot. Add the rest of the stock or water. Meat should be submerged into the liquid about 1/3 way.


7. Bring to a boil, cover, and place in the oven.


8. Let cook for 4-5 hours, until for tender. Halfway through the cooking process you can rotate the beef and redistribute the juices.


9. As you can see the meat shrunk, but in doing so it also absorbed all the delicious flavors in the liquid...


 10. I served mine on a bed of spinach, with a side of puree cauliflower-parsnips-sweet potato puree and some from tomatillos on top!

BTW, we have leftover for a few days...that is another reason why this dish is a One Pot Wonder!)


Sunday, September 7, 2014

Got Bone Broth???...Tasty, Satiated, and Makes Me Feel Good...

Got Bone Broth?


As I sit here at my computer writing this blog post, drinking my bone broth, I think to myself...Why would anybody spend 4-48 hours making broth from bones (time depends on what kind of bones you are cooking - see chart below)...

Way back when in the paleolithic days, hunters and gathers would eat every part of the animal and use the bones to make stock. What on earth told them to do that? How did they know they could do that? How the hell did they get those big bones into to their pot without a butcher cutting them up?

Anyhow enough with those times, let's get back to our times... 

Canned and box broths, although very convenient, many products in our grocery stores are loaded with MSG's, preservatives, sodium, and other (sometime) hidden ingredients to make its shelf life longer and 'taste' better (for the average American palette).

One of the first lessons I learned in culinary school was how to make bone broth...WHY???

Because as chefs we are taught not to waste anything. We are taught to save all the scraps, bones and ends bits of everything because there is always another way to use those pieces and it reduces food costs...Although I don't cook in a professional kitchen now, I am the chef of my home kitchen and I run my kitchen professionally which is the major reason I make bone broth almost every Sunday!

Another reason I make it, which they did NOT teach me in culinary and had to research myself are the health benefits....There are so many you wouldn't believe...Below are my top 5!

1. Bone Broth Heals The Gut 
The gut in permeable which is good because it allows nutrients to pass through, but due to bad diet, stress, sleep deprivation, long term contraception, etc., the gut can become too permeable and when that happens people begin suffering from gastrointestinal issues (i.e. leaky guy, bloating, constipation, diarrhea, autoimmune diseases, etc.), which is bad. The gelatin in the bone broth helps clog the holes in the gut so it's not too permeable and helps stop gut issues.

2. Bone Broth Helps Make Your Joints Juicy
In order to keep your joints juicy and supple you need to feed them collagen, a large family of biomolecules which include glycosaminoglycans (GAG's). Bone broth is loaded with GAG's which come in many forms. One of the most popular GAG's/supplements is glucosamine which helps supports healthy joints and muscle recovery. So you not only get glucosamine in the bone broth, you also get other hard to find GAG's.  

3. Bone Broth Helps Make You Look Sexy 
Again, bone broth has collagen and the production of collagen helps stop the outward sign of aging, supports silky skin, shiny hair and strong nails.

4. Bone Broth Helps Detox 
The liver is constantly under attack and needs help to detox your body. One of the liver's major helpers is glycine, an amino acid found in bone broth. So instead of going for that juice filled with sugar labeled 'Detox', heat up a cup of bone broth to detox your body. I doubt that juice has the ability to supply glycine to your liver.

5. Bone Broth Reduces Satiates
Bone broth is more satiated than a cup of coffee in the morning...you don't believe me try it...
I'm giving up coffee for the Whole30 and instead I'm drinking bone broth first thing in the morning (around 6am). I find myself satiated until about 9:30am, when I eat a few egg muffins...I also find myself not craving as much protein during the day because many of the nutrients I'd get from other protein sources I'm getting from the nutrients that cooked out of the bones and into the broth...

Cooking Bone Broth Times
Beef, Lamb, Buffalo, Pork Bone : 18 - 48 hours
Chicken, Duck, Turkey : 12 - 16 hours
Fish (any kind) : 4 - 6 hours

Check out my beef bone broth recipe....


Wednesday, September 3, 2014

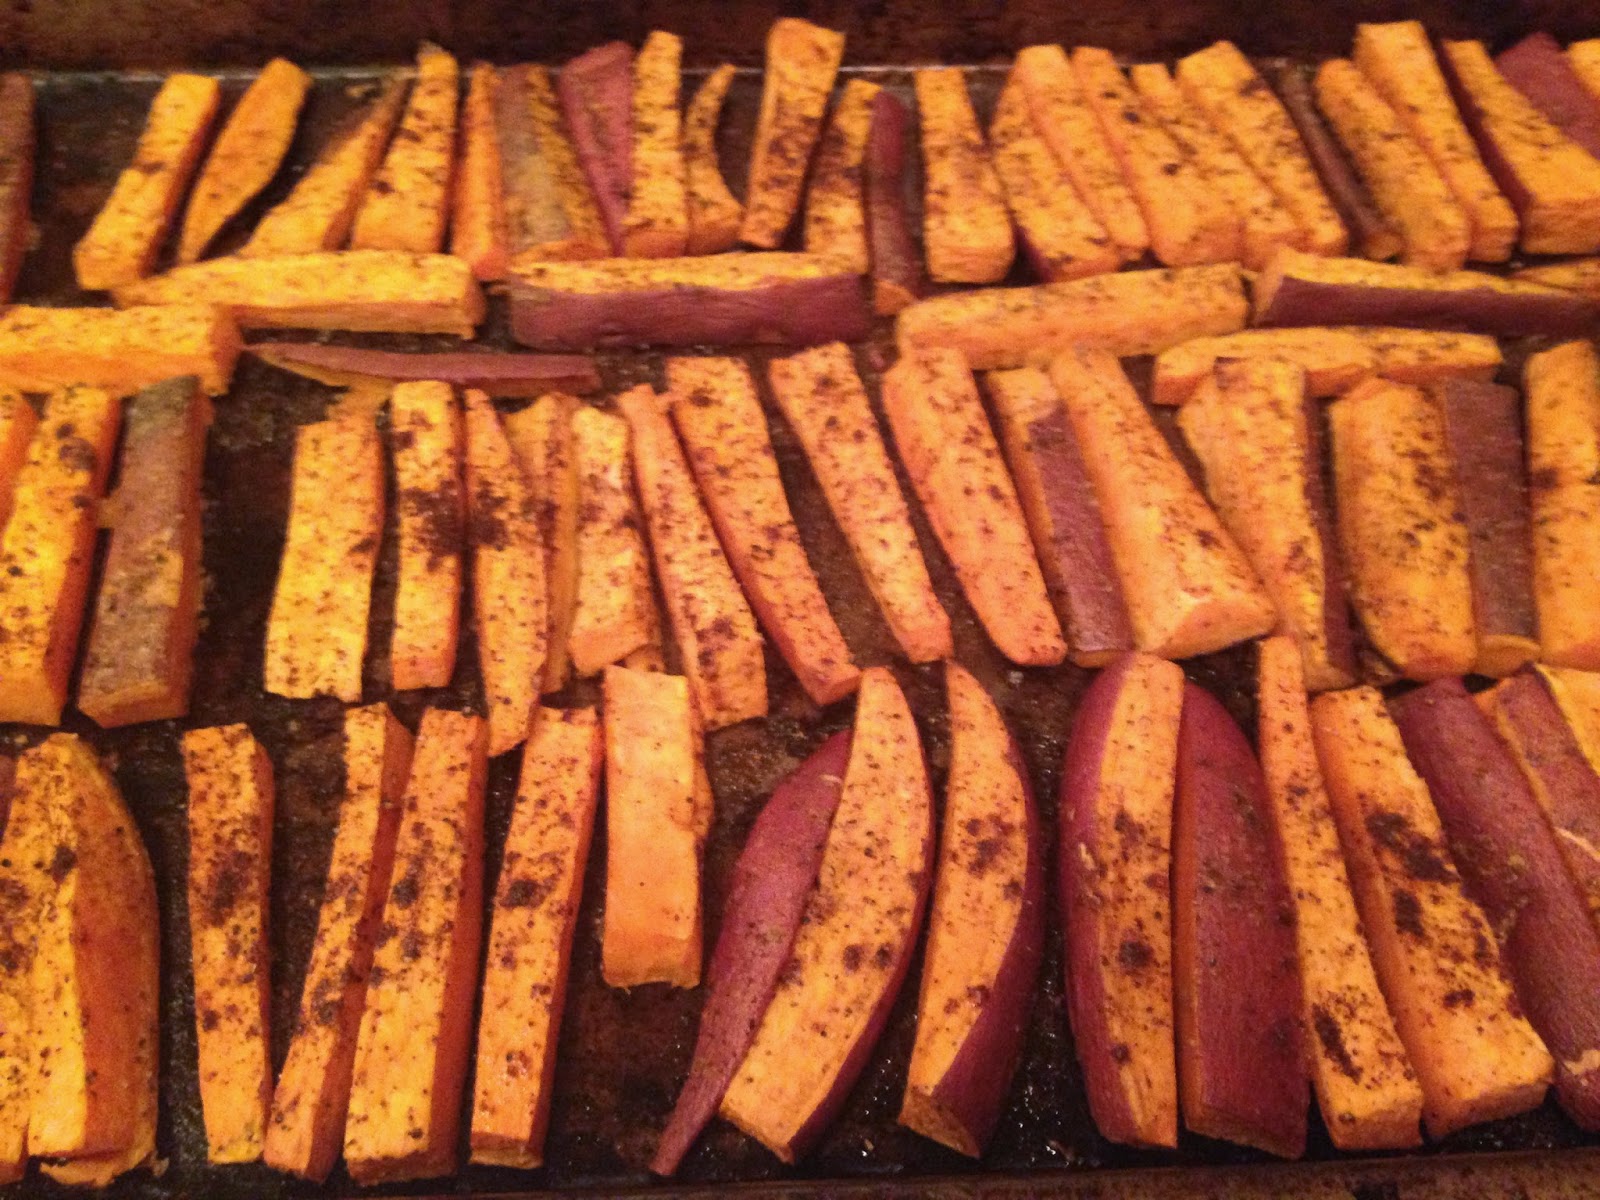
If you are craving carbs - Make Sweet Potato Fries...They are sweet & easy...


On heavy lifting workout days, like today, I needed some extra carbs especially in the mist of a  Whole30 challenge...

My go-to low-carb, carb are sweet potatoes and when I'm craving something crunchy and 'semi'-fried (more like baked) I reach for sweet potatoes...Truth be known, I used to hate sweet potatoes, I thought they were too sweet, but a couple of years ago my mind changed and I started cooking them...

Here's my go-to easy recipe...

Ingredients:
- 2 lbs Sweet Potatoes, cut into fries with skin on optional 
(Personally I like Yams or Garnets - they have the most moisture & flavor)
(If you buy more then you'll have awesome leftovers you can mix with eggs or mash or make into sweet potato cakes - I'm a fan of leftovers, but many people aren't)
- 1 cup Coconut Oil, melted
- Salt & Pepper
- Curry Powder
- Garlic Powder
- Smoke Paprika
- If I wasn't on the Whole30 I would sprinkle a little brown sugar

Instructions:
1. Pre-heat oven to 375 degrees
2. Place the cut sweet potatoes in a big bowl and pour the melted coconut oil over them. Toss to coat thoroughly.
3. In a small bowl, mix all the seasonings together.
Note: I didn't give you measurements for the seasoning because I don't measure them. I just pour seasonings in a bowl, taste before I add it to the sweet potatoes and adjust if needed. You will know if it is needed (i.e. too salty, too sweet, too spicy...) You might not need the all the seasoning you mix at once so save what you don't need for another dish (i.e. chicken, steaks, fish, portabellas)
4. Using a small strainer, cover the sweet potatoes with seasoning and toss to coat.
Note: I like to use a strainer to help me season because it evenly distributes the seasonings, so when you take a bite into the fry it's not completely covered with seasoning or is completely bland because it has no seasoning.
5. Spread evenly on a baking sheet, see image above.
6. Bake for 35-45 minutes, until soft inside and crunchy outside. You might want to flip them 20-25 minutes into cooking so they don't get overcook on one side and not the other, that is bad french fry cooking...
6. Take them out of oven and wait at least 5 minutes for them to cool down (you don't want to burn your tongue) and drip them awesome sweet potatoes fries in my Tomatillo - Jalapeño - Avocado Aioli...
OMG!!! I made it through another day on the Whole30:-)))))

Tuesday, September 2, 2014

My Go-To Chicken Salad Recipe - This Week Featuring a Tomatillo - Jalapeño - Avocado Aioli...

I usually make some kind of poached chicken salad for the week, it's my go-to lunch/snack...

Why poached the chicken...??? 
Because it stays juicier and absorbs the flavor of the dressing/sauce better...

Why Tomatillo - Jalapeño - Avocado Aioli...
Because I had fresh tomatillos and jalapeños from my garden and in my opinion nothing goes better with those two ingredients then avocado...so I used an avocado (good source of fat) instead of oil to create this deliciously creamy aioli...You might want to double the recipe so you have it for the week!

Ingredients: Poached Chicken
- 4 Organic/Free Range Skinless Chicken Breasts (3 lbs)
- Salt & Pepper
- Curry Powder
- Chile Powder
(Note: you can use whatever spices you like, but whatever you do - SEASON THE WATER)

Instructions: Poached Chicken
1. Season the chicken breast liberally with salt, pepper, curry & chile powder. I like to season the chicken before putting it in the water and instead of putting the seasonings in the water because then I know I seasoned it enough. If I just season the water, then I tend to not season it enough.

2. Place the well-seasoned chicken in a pot.


3. Cover chicken with water, a couple inches from the rim. Don't fill it up all the way or it will boil over and you will create a mess:-(


4. Bring to a boil with lid off, cover and bring to a simmer (low heat) for about 10-15 minutes. Turn off and let sit for another 5-10 minutes.

5. Chop the chicken by cutting through the middle, stacking it on top of each other and cut lengthwise, then cut across to make cubes.

6. Place the chopped chicken back into the broth if & only if you like your chicken salad a little wet or if the chicken still needs to cook a little. Cover the pot if the chicken still needs to cook, if it's really pink put it back on the stove for a little longer.


7. Drain the chicken (I keep the chicken stock because I know I'll use it for something).

8. In a big bowl, fold in about 1 cup of aioli to the chicken. This week I also added some red bell pepper, shredded carrots, and some shredded brussels sprouts and kale (since I had those items in the fridge already).

9. My go-to wrap is CABBAGE, it's not only Whole30 certified, it also stays crunchy unlike bread and I love crunch...

In my opinion...eating is 30% texture, 50% flavor & 20% appearance...

Below is what I had for lunch...hope you guys give this a try...


Ingredients: Tomatillo - Jalapeño - Avocado Aioli
- 2 Large Eggs (Organic/Free Range)
- 5 Tomatillos (Fresh)
- 1 Lime, Juiced
- 1 Lemon, Juiced
- 1 Jalapeño (I like to seeds for heat, but deseed if you don't like it HOT)
- 1 Large Avocado
- Salt & Pepper to Taste

Instructions: Tomatillo - Jalapeño - Avocado Aioli
1. While the chicken cooks, whisk the eggs in a food processor or blender. Add the juice of 1 lime and 1 lemon. Add tomatillos and jalapeño and let the ingredients meld together. Add the avocado last and blend until mixture becomes fluffy and creamy.

2. Remember, make double or you will regret it...this is great with egg muffins, dip with veggies, spread it over fish, dip with sweet potato fries...

Monday, September 1, 2014

Breakfast-On-The-Go : Egg McMuffin, without the Muffin...

Many of you ask me what to eat in the morning...This is one of my go-to on-the-go breakfasts, high in protein, good fat and can be made with any leftovers in the fridge...I make them on Sunday and eat them throughout the week...they are good hot or cold...
Try popping one of these in your mouth after a WOD...

Mini V-Egg Muffins
Ingredients: Yields 24-30 Mini Muffins
- 12 large eggs (organic & free range)
- 1/2 cup coconut milk (full fat)
- 1 cup sun dried tomatoes
- 1/2 cup olive/mushroom tapenade
- Coconut Oil Spray
-Salt & Pepper to taste

Instructions:
1. Pre-heat over 350 degrees.
2. Whisk eggs with coconut milk (salt and pepper optional - note the sun dried tomatoes and tapenade has salt and other seasoning so take it easy on the SP).
3. Chopped sun dried tomatoes and olive/mushroom tapenade together.
4. Spray the muffin baking sheet wil coconut oil.
5. Place 1 tsp of sun dried tomato and tapenade at bottom of muffin hold, see below.


6. Pour egg mixture (1/4 inch from lip) on top of sun dried tomato/olive tapenade. Don't pour too high, the egg fluffs as it cooks so it needs a little room to cook. 


7.  Cook for 10-15 minutes, until eggs fluff and are fully cooked.


8. Take out of oven and let rest (about 10-15 min), and spoon around the egg muffin to take out.

Salmon Egg Muffins
Same concept, just a little bigger muffin pan and made with Salmon since I had leftovers...

Ingredients: Yields 12-14 Mini Muffins
- 10 large eggs (organic & free range)
- 1/2 cup coconut milk (full fat)
- 1 1/2 cup cooked salmon
- 1/3 cup olive/mushroom tapenade
- Coconut Oil Spray
-Salt & Pepper to taste

Instructions:
1. Pre-heat over 350 degrees.
2. Whisk eggs with coconut milk (salt and pepper optional - note the sun dried tomatoes and tapenade has salt and other seasoning so take it easy on the SP).
3. Chopped salmon and olive/mushroom tapenade and mix together.
4. Spray the muffin baking sheet wil coconut oil.
5. Place 1TBS of salmon and tapenade at bottom of muffin hold.


6. Pour egg mixture (1/4 inch from lip) on top of sun dried tomato/olive tapenade. Don't pour too high, the egg fluffs as it cooks so it needs a little room to cook. 


7.  Cook for 10-15 minutes, until eggs fluff and are fully cooked.


8. Take out of oven and let rest (about 10-15 min), and spoon around the egg muffin to take out.